Infoportal
Beckhoff CX2020
The Beckhoff CX2020 is a PLC based on a x86_64 PC. It's I/O modules are controlled using EtherCAT called „Beckhoff CCAT“. By default it runs Windows Embedded 7 but is also capable of running Linux.
Create a backup of the preinstalled Windows image before overwriting it with the linux image! Windows is required to run Beckhoff's TwinCAT software to read the EtherCAT configuration and generate the ENI file.
Scanning the EtherCAT bus / Generating the ENI file
Download TwinCAT 3
To scan the EtherCAT bus on the CX2020, 2 pieces of software are needed: The TwinCAT Extended Automation Engineering environment and the TwinCAT extended Automation Runtime. The download for the runtime should include both and can be obtained here: https://www.beckhoff.com/twincat/
Note that the runtime needs to be installed on the CX2020 while the engineering environment should be installed on your normal work (Windows) PC, from hereon out referred to as the host.
Connecting the host to the CX2020
Once both pieces of software are installed, both the host and cx2020 should have TwinCAT running in the background. There should now be a TwinCAT tray icon in the taskbar:
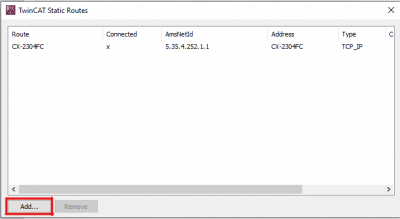
On the host: right click the tray icon and select router→edit routes.
This will bring up a new window showing the configured routes.
On the bottom left, click add
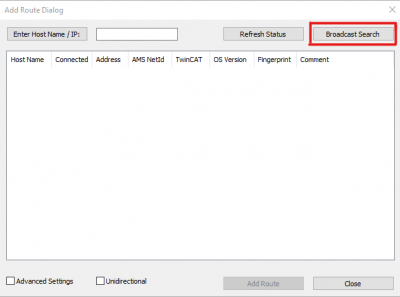
Now a broadcast search should find the CX2020.
The CX2020 should now show up in the list with an x in the connected column.
Create a new TwinCAT XAR project and scan the bus
Unfortunately, the TwinCAT engineering environment does not seem to have the option to just read the EtherCAT configuration and generate the ENI file . It is only possible from within a project.
To create a new project, open the TwinCAT XAE environment on the host. It may also be called TwinCAT XAE Shell.
At the top, there should be a toolbar looking like this:
If it says TwinCAT RT (x64), change it to TwinCAT RT (x86) using the drop down menu (the little triangle to the right).
Change <Local> to the CX2020. Since it was added to the routes in the previous step, it should be available in the drop down menu.
The end result should look similar to this:
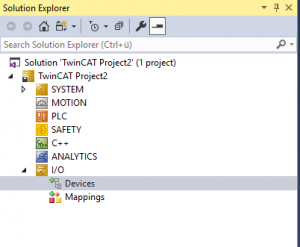
In the solution explorer (on the left), right click on Devices and then click Scan.
You will get a warning that not all devices can be automatically detected, simply click OK.
Once it is finished, a dialog box will show the network devices found.
Click ok once more.
When asked to scan boxes, click Yes, and then No when asked whether to active free run mode.
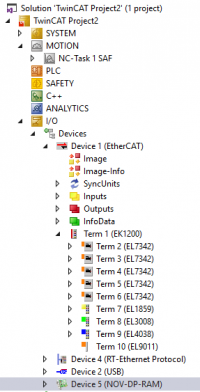
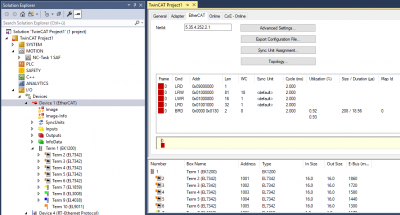
The conncted devices should now be listed under I/O.
Generate the ENI file
Double click on Device 1 (EtherCAT) and in the main window, go to the EtherCAT tab.
To generate the ENI file , click on Export Configuration File.

