Infoportal
Dies ist eine alte Version des Dokuments!
BeagleBone Blue
QuickLinks
The BeagleBone Blue is a single board computer with a 1GHz Texas Instruments Sitara AM335x (single core) and 512 MB RAM. Further, there is a HDMI connection, 2 GB eMMC Flash, USB, Ethernet, microSD and various digital I/O and ADC.
Quick Start
A new BeagleBone Blue board comes with debian preinstalled. It can be connected to a host with a USB cable. Upon booting a heart beat application starts automatically which causes the leds to blink. We strongly suggest to flash the board with our custom built linux image. This image contains the librobotcontrol version 1.1.0 together with examples testing all the available peripherals.
The preinstalled debian image has the following features
IP address 192.168.7.2
Username:debian PW:temppwd
Beside that you have a root user with password:toor
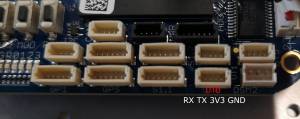
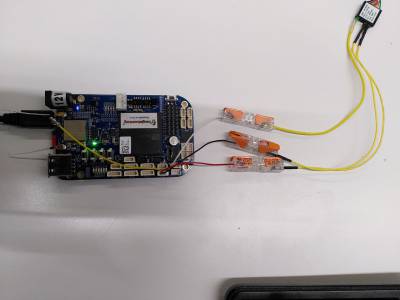
If anything does not work with your Ethernet over USB interface, you can use the console on UART0 to query your system. For this you need a special USB-TTL-3v3 cable and an according 4-pin adapter cable. Connect it to the pins on the board as follows:


NOTE: TX and RX are labelled from the perspective of the UART Cable! Connect the cable/adapter's RX to the pin labelled RX (Pin 4) and the adapter's TX to TX (Pin 3).
Please also note that you need to power the BeagleBone Blue device by using the generic 5V USB port or the 12V power port as it is not sufficient to just power the device via the 3.3V USB UART port!
You can then connect to the BeagleBone Blue device via serial console (e.g. PuTTY) with a baudrate of 115200.
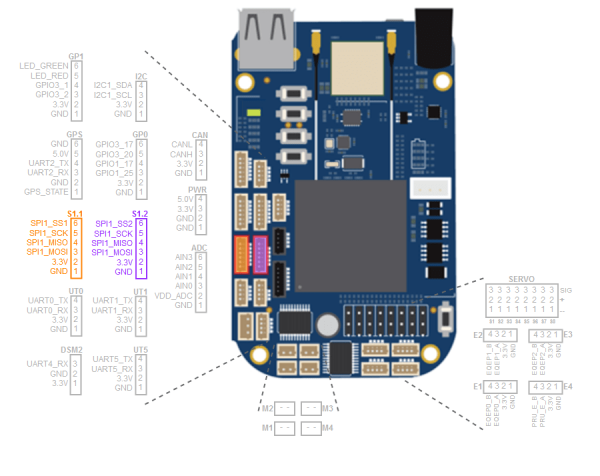
Connectors
Troubleshooting
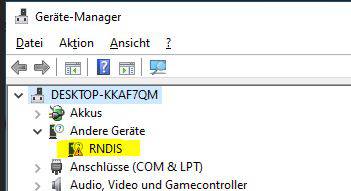
Using the Beagle Bone Blue attached via USB onto a Windows host may cause the device not being recognized correcty as a RNDIS network device, instead it may show up as a default serial COM device or as a unknown RNDIS device with a missing driver as follows:
This is a known issue and caused by the wrong driver being taken by the OS or simply by missing the driver. Either way, to prevent this behaviour, the following driver for the according device has to be changed manually by downloading, unpacking and installing it via Windows Device Manager:
RNDIS driver
Further Informationen
- Robot Control Library:
- main site: http://beagleboard.org/librobotcontrol/
- Using the board with our custom build image


